

Many Utah homeowners ask us how to heat a pavilion so they can enjoy their outdoor space comfortably throughout the year. A timber frame pavilion starts with an advantage over a pergola: the solid roof already blocks sun, rain, and snow, so heating it for fall, winter, and early spring comes down to picking the right mix of heat, wind protection, and electrical planning. We build custom post-and-beam pavilions across the Wasatch Front with mortise-and-tenon joinery, and we plan heating and lighting circuits into the frame before we ever cut a beam. This guide walks through patio heaters, radiant panels, fireplaces, and partial enclosure, along with what permits and electrical work actually look like in Utah.
Quick Answer: A pavilion is easiest to heat year-round with a mix of propane or electric infrared heaters for instant warmth, radiant ceiling panels for even heat across the space, and partial enclosure with wind walls or clear vinyl curtains to hold that heat in. We plan the wiring and gas lines into the frame before construction so nothing ends up surface-mounted later.
Best Ways to Heat a Pavilion Year-Round
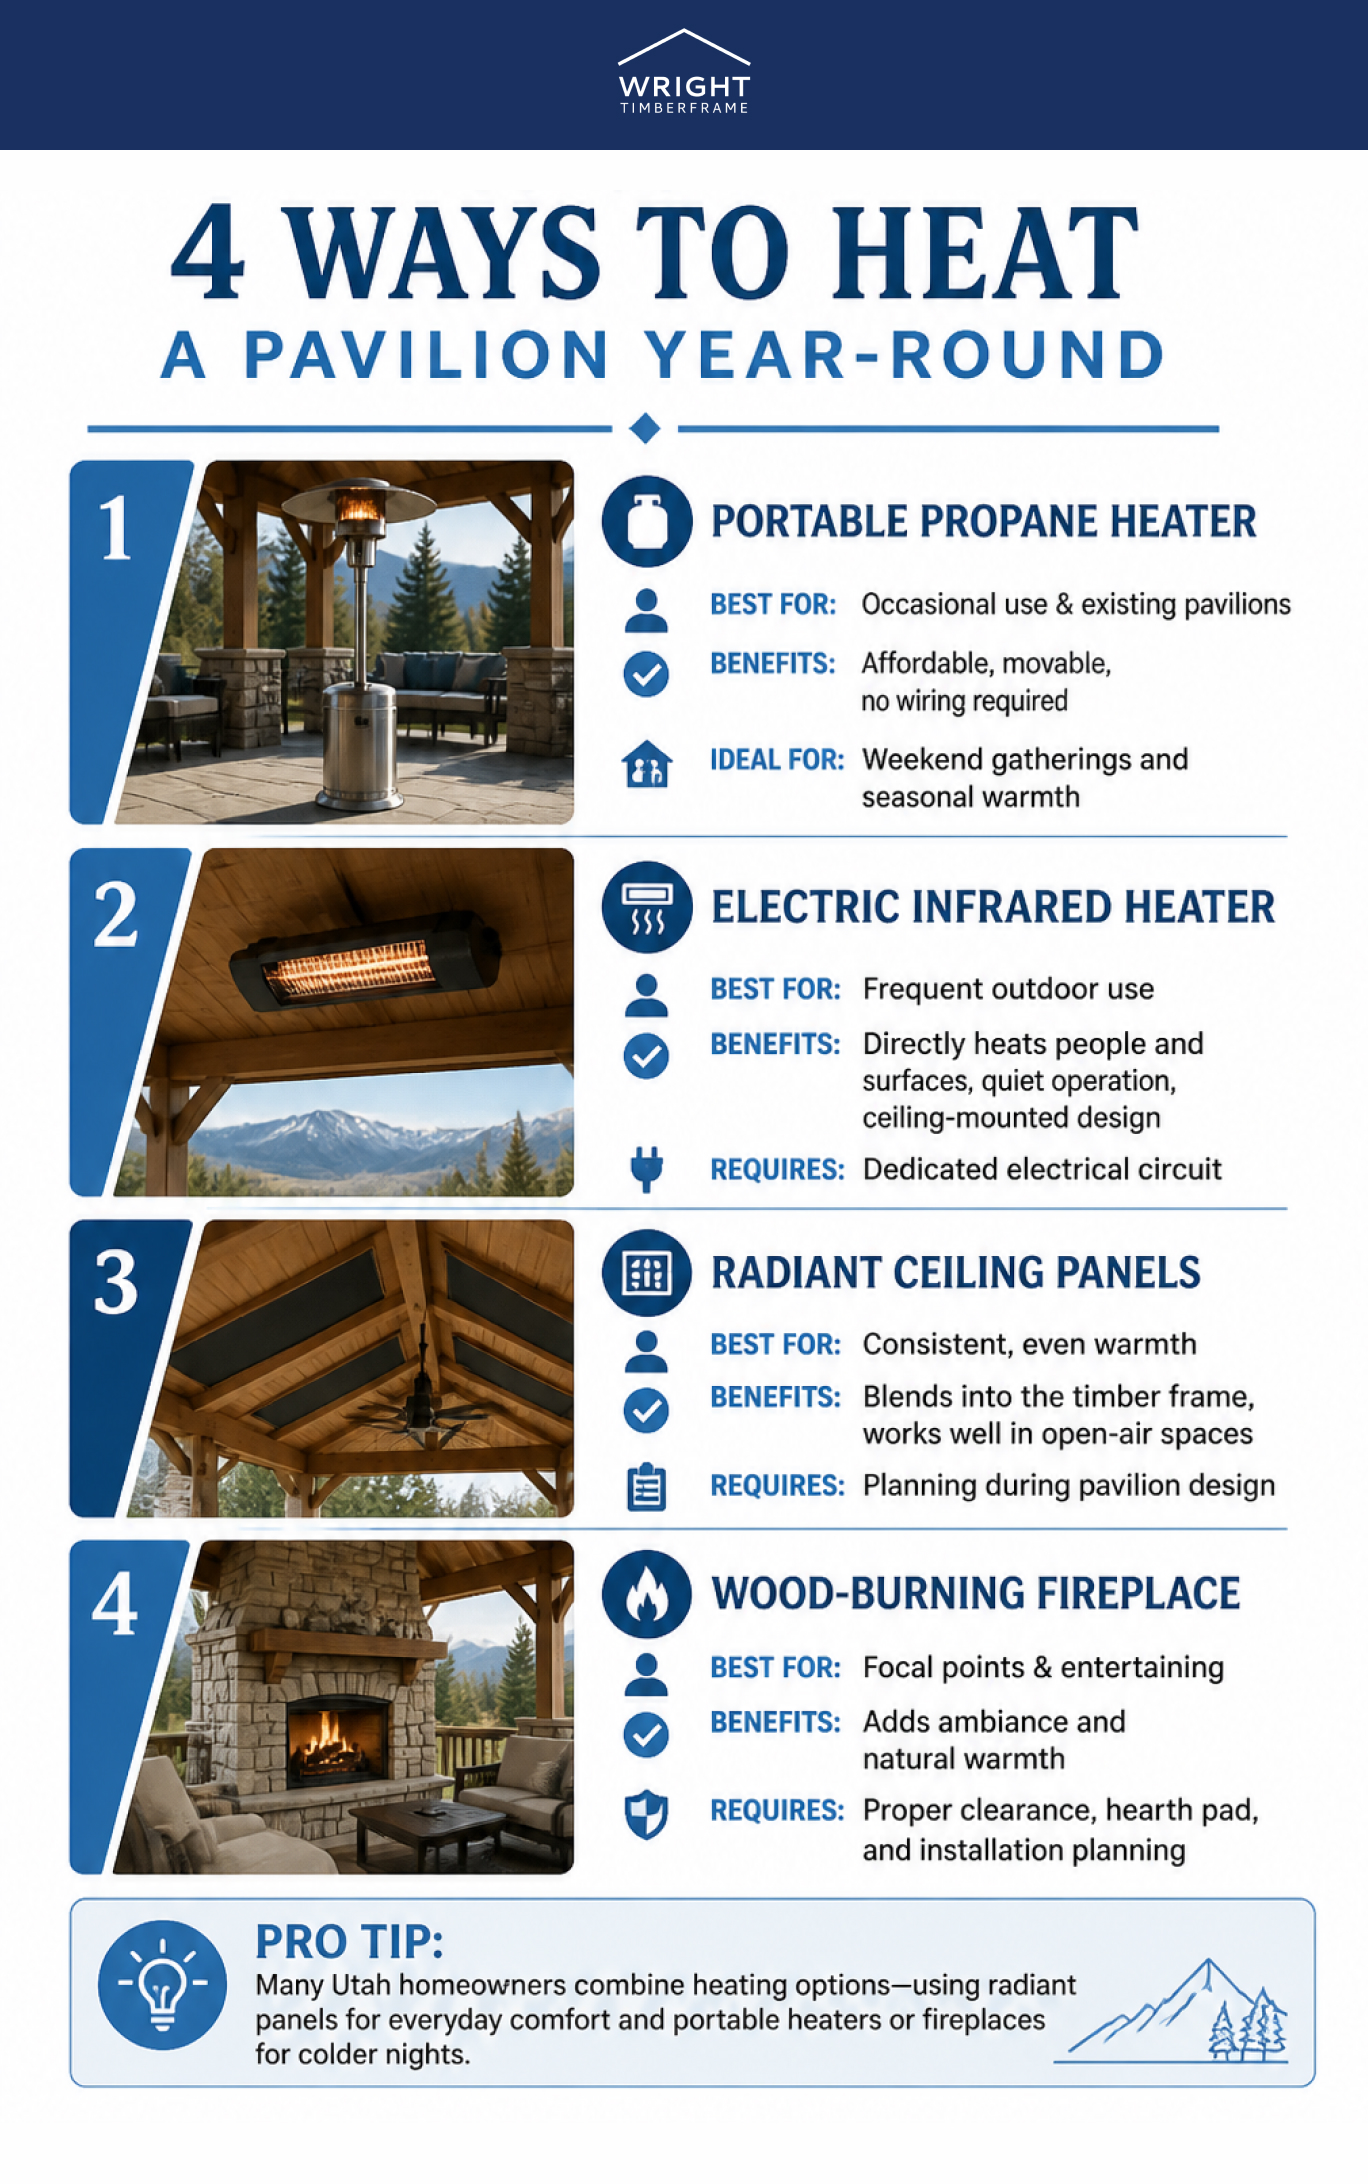
The most common ways to heat a pavilion are propane or electric infrared heaters, radiant ceiling panels, and a wood-burning fireplace, and each one fits a different budget and use pattern. A propane heater needs no wiring and can move with you, while a hardwired option adds cost up front but disappears into the ceiling once it is installed. Most Utah homeowners end up combining two of these: a fixed radiant panel for baseline warmth and a portable heater for the coldest nights.
The right combination depends on how you actually use the space. A pavilion built mainly for weekend dinners might only need a couple of portable heaters brought out on cool evenings, while a pavilion that doubles as a home office or a daily gathering spot benefits from a fixed radiant panel that runs on a thermostat. We ask about this use pattern early, because it changes where we route conduit and how many circuits the pavilion needs.
Propane and Electric Infrared Heaters
A freestanding or wall-mounted propane heater is the fastest way to add heat to a pavilion that is already built, and it needs no permanent wiring or gas line. Electric infrared heaters mount overhead and warm people and surfaces directly instead of heating the surrounding air, which works well in a space that is open on the sides. An electric infrared unit needs its own dedicated circuit and a weather-rated, GFCI-protected outlet, so we plan that circuit into the design rather than adding it after the frame goes up.
Propane heaters cost less up front and give you the flexibility to reposition or store them in the off-season, which suits a pavilion used mainly for entertaining a few nights a month. Electric infrared units cost more to install because of the wiring, but they run quieter, need no fuel tank to refill, and mount flush against the rafters instead of standing on the deck. Many of our Utah clients start with a portable propane heater the first season and add a fixed infrared unit once they know exactly where they sit most often.
Radiant Ceiling Panels and Wood-Burning Fireplaces
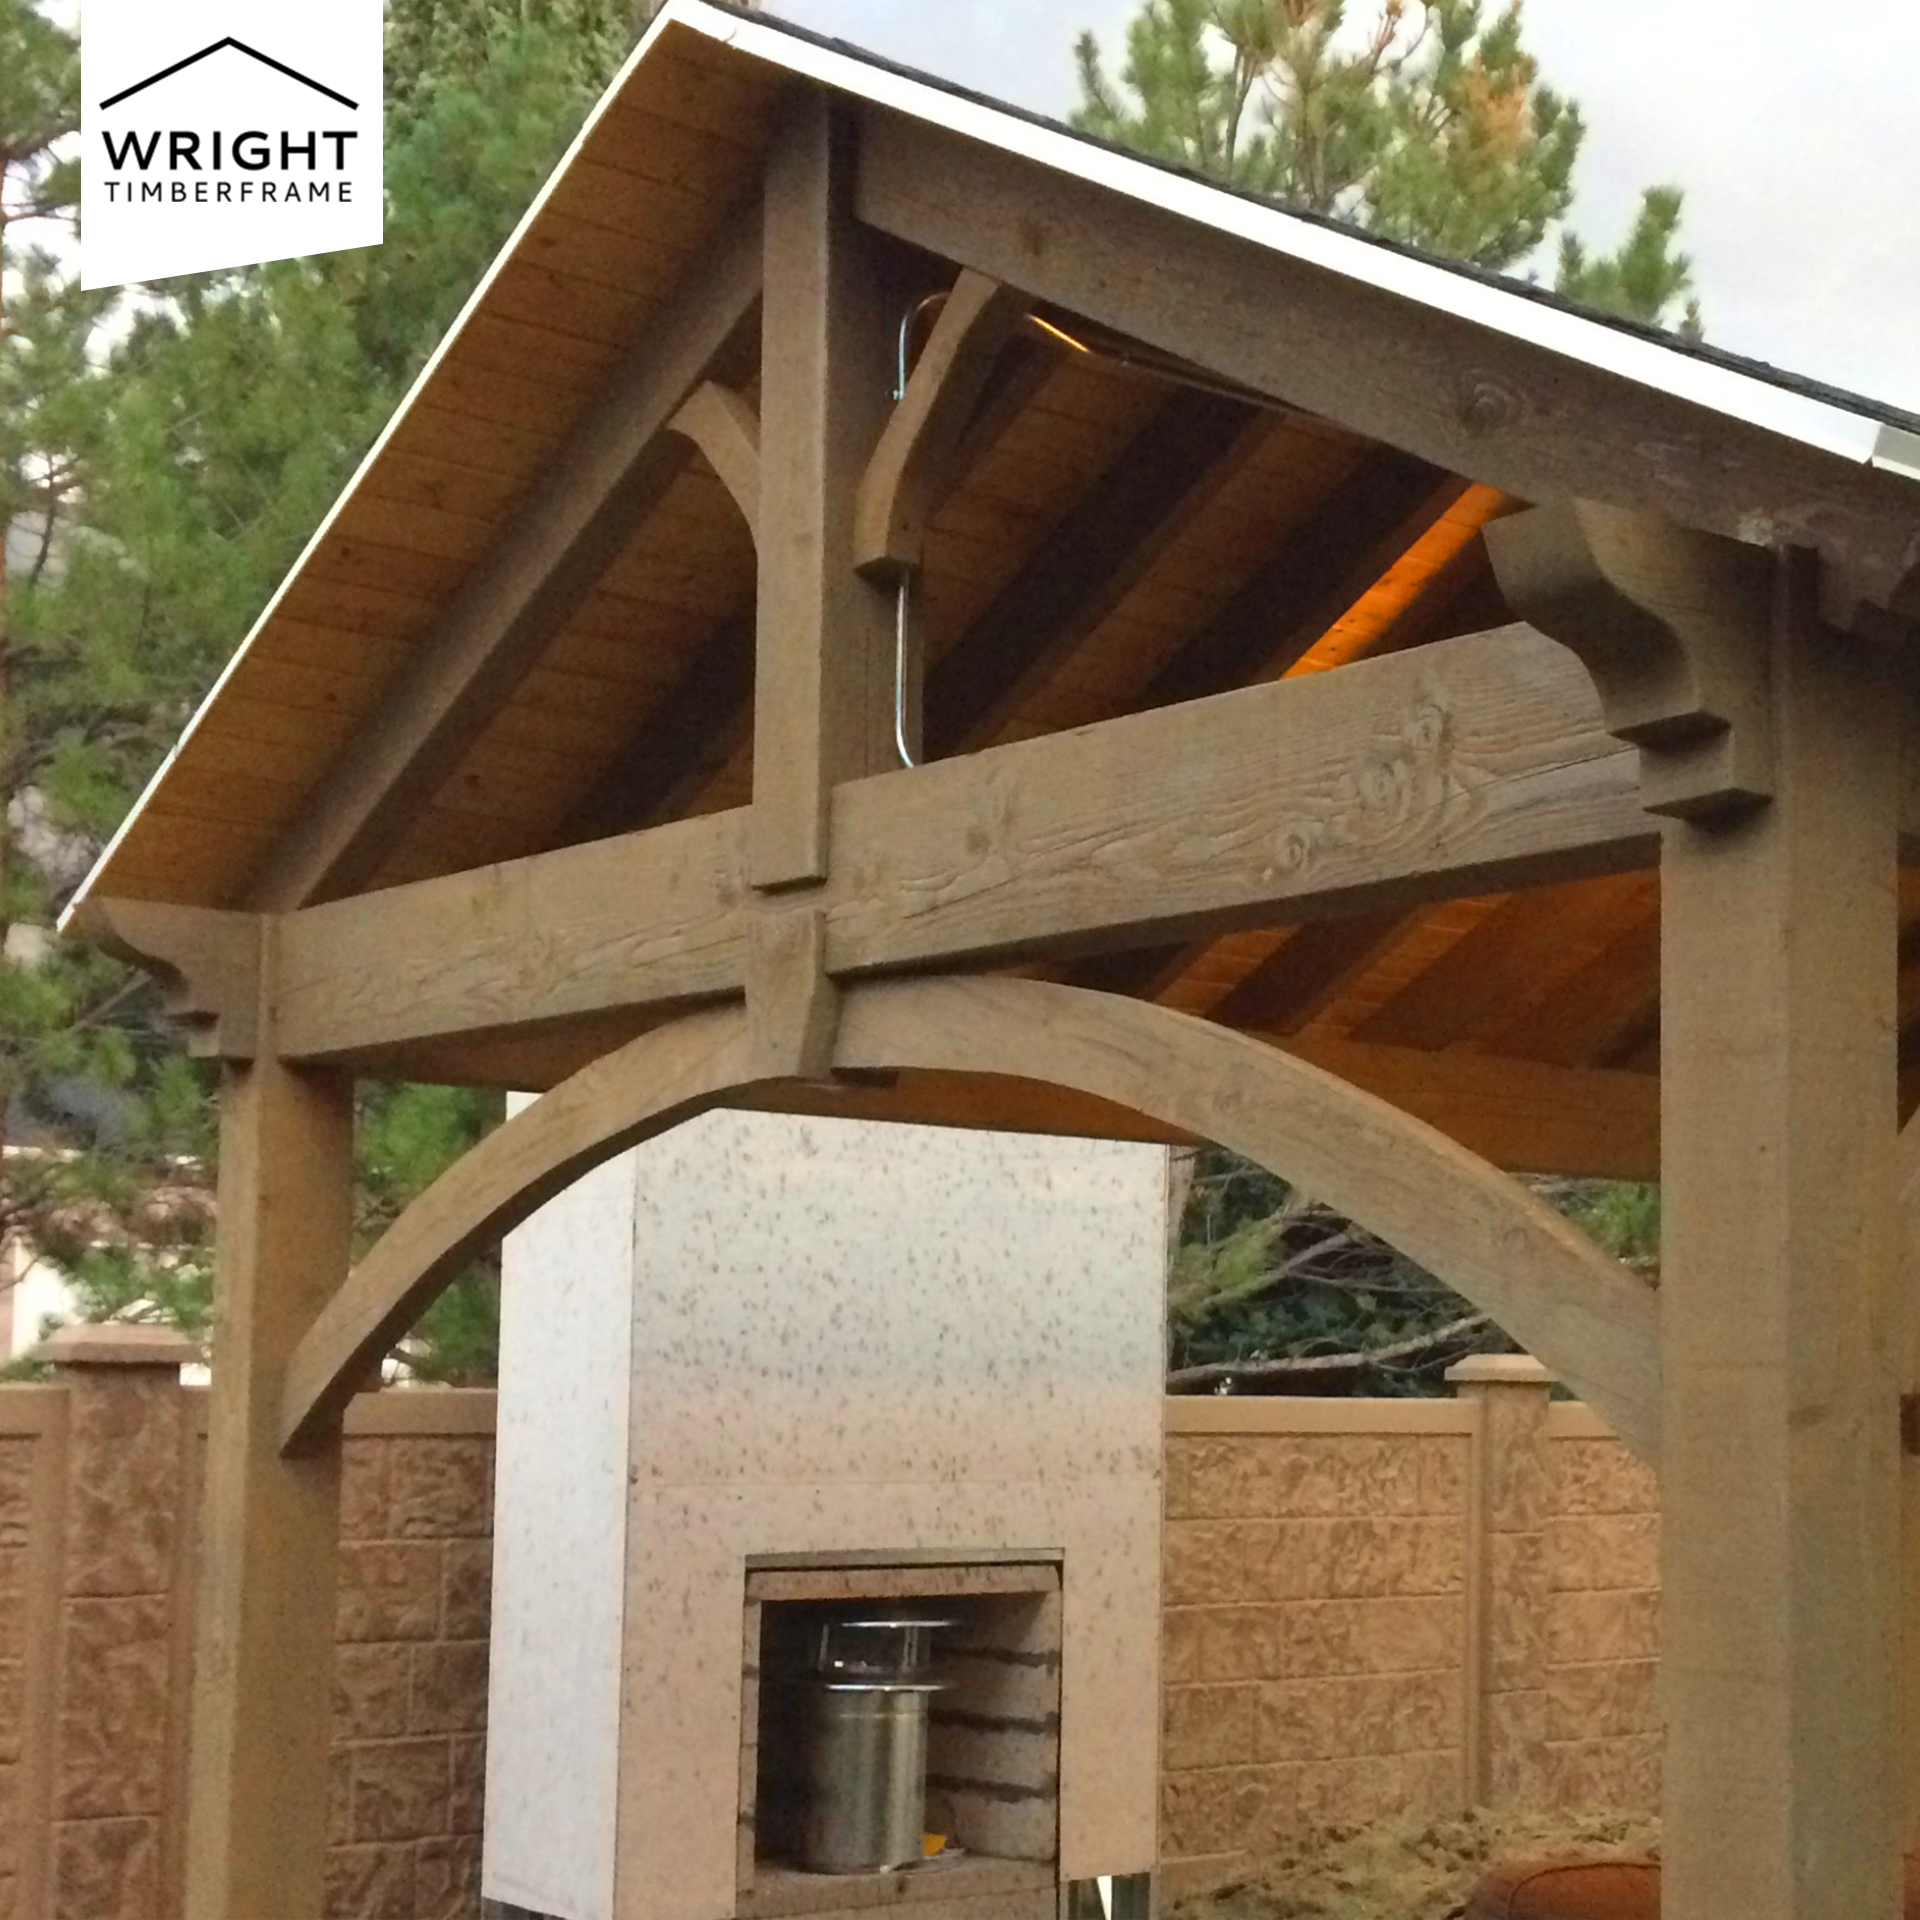
Radiant ceiling panels mount between the rafters and run on a dedicated circuit, and because they heat objects and people rather than air, they hold up well against Utah wind. A wood-burning fireplace or a UL-listed prefabricated fireplace insert gives a pavilion a real focal point, but it needs masonry or a listed hearth pad and the clearance to combustible framing that the manufacturer and local fire code both require. We route gas or electrical service to that location during the framing stage so the finished pavilion never shows exposed conduit.
| Heat Source | Power / Fuel | Best For | Install Complexity |
| Portable propane heater | Propane tank | Occasional use, no wiring | Low, no install needed |
| Electric infrared heater | Dedicated 120V/240V circuit | Frequent evening use | Moderate, needs an electrician |
| Radiant ceiling panel | Dedicated circuit | Even, ambient heat | Moderate, best planned before framing |
| Wood-burning fireplace | Wood or gas insert | Focal point, occasional use | High, masonry or listed hearth pad |
Fire Pits as a Heat Source
A fire pit adds real, ambient heat and works well for evening gatherings, but it warms a smaller radius than a mounted heater or a radiant panel and needs its own clearance and a non-combustible pad. We treat a fire pit as a complement to a heater or panel, not a replacement for one, especially once the temperature drops into the 30s. For layout ideas and clearance basics, see our fire pit ideas for a backyard pavilion and our guide to building a pavilion with a fire pit.
Partial Enclosure Options That Hold Heat In
Wind walls, clear vinyl curtains, and screen panels turn an open pavilion into a semi-enclosed space that holds in heat from any of the sources above. A knee wall or a fixed wind panel tied between two posts blocks the prevailing wind without closing off the view, and it works especially well on the side of a pavilion that faces west or north across the Wasatch Front. A retractable clear vinyl curtain track lets you close the space entirely on a cold night and open it back up in the spring, and a screen panel keeps bugs and light wind out during shoulder-season evenings when a full enclosure is not needed.
None of these options seal a pavilion the way a sunroom or a fully framed wall would, and that is by design. A pavilion stays an open-air timber structure with the option to close down part of it, which keeps the airflow and the sightlines that make it feel like an outdoor room in the first place.
Lighting and heat usually get planned together, since both need a circuit routed through the same posts and rafters. If you are also weighing string lights, sconces, or overhead fixtures for evening use, our pavilion lighting guide walks through the fixture options we install most often.
Electrical and Gas Line Planning
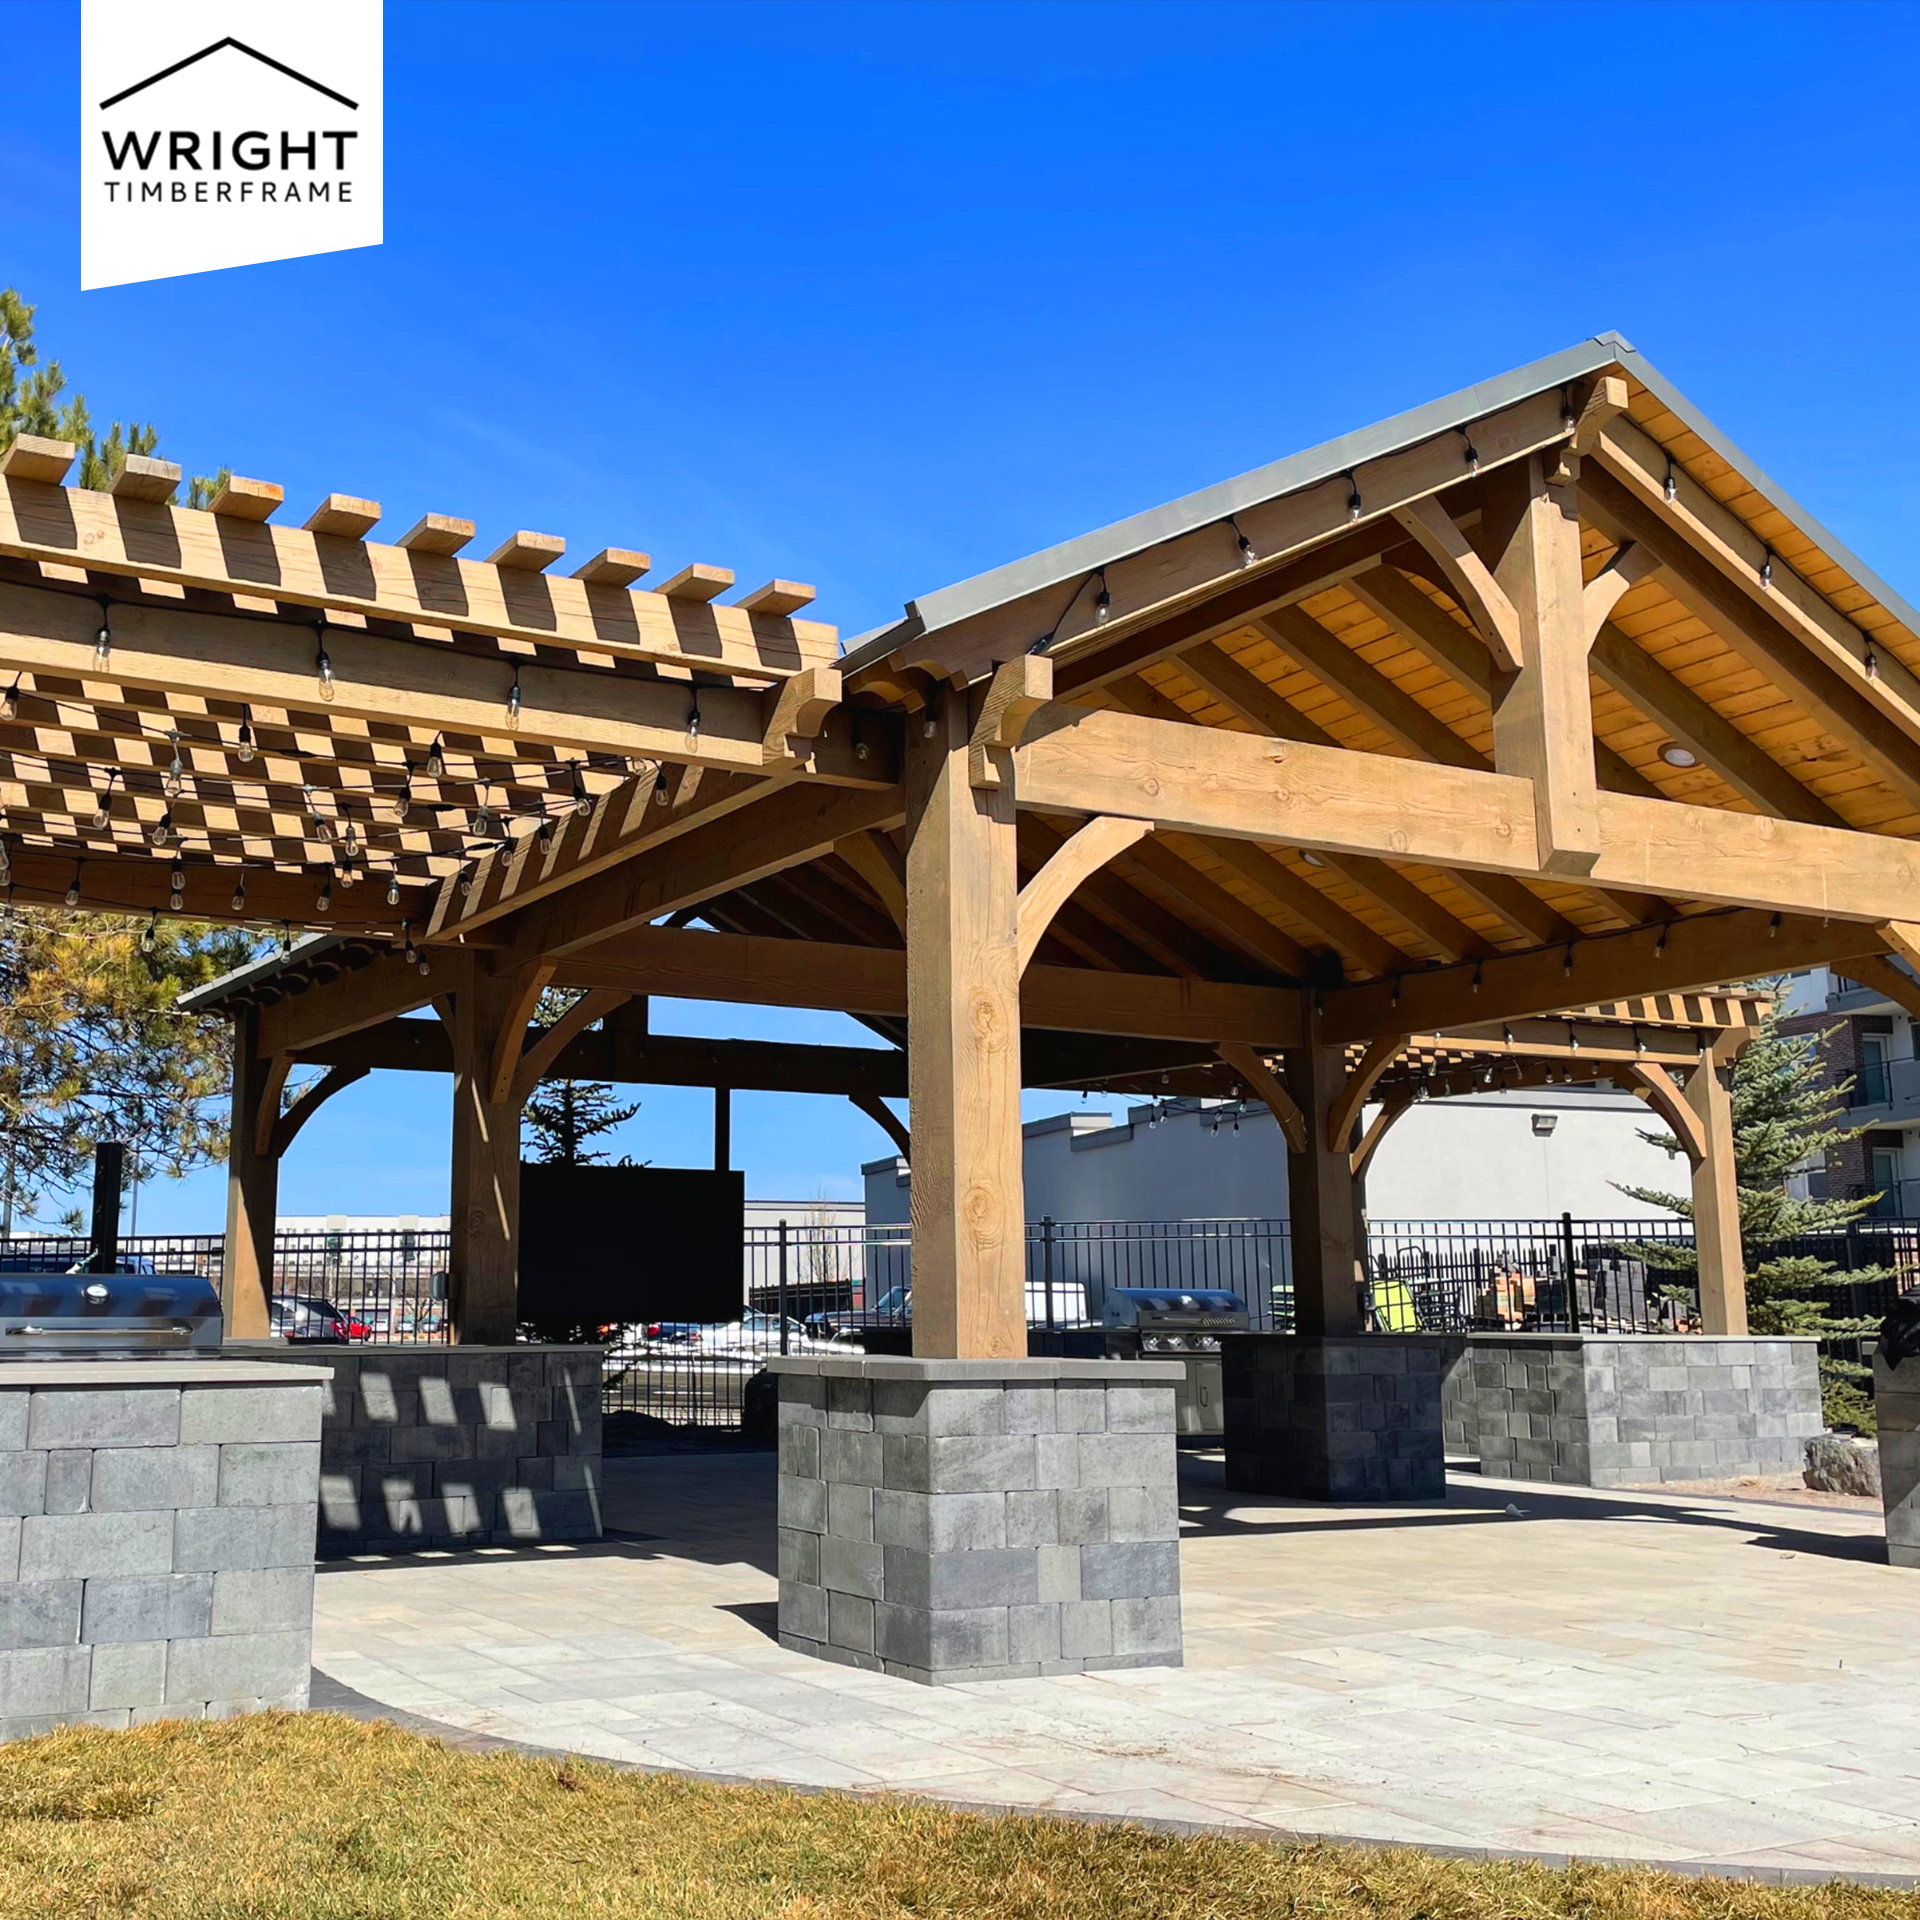
Running conduit through the posts and beams before assembly is the cleanest way to wire a pavilion for heaters, fans, and lighting. Once mortise-and-tenon joints are cut, and the frame is raised, there are very few places to hide a new wire without surface-mounting it, so we ask about heating, fans, and lighting at the design stage, before a single timber is cut.
Planning Wiring Before the Frame Goes Up
We chase conduit through the core of select posts and beams at the shop, then thread the wire once the frame is raised on site, so the finished structure shows timber and joinery instead of exposed cable. This only works if we know the heater, fan, and outlet locations before we cut the frame, which is why we walk through electrical needs during the design phase rather than after the quote.
Working with a Licensed Electrician and Local Code
Any permanent circuit for a heater, fan, or outlet should be run by a licensed electrician, and any outdoor receptacle needs GFCI protection, a requirement the Consumer Product Safety Commission explains applies to any outlet exposed to moisture. A gas line for a fireplace or a fixed heater is run by a licensed plumber and inspected the same way any other gas appliance install is inspected.
Why Planning Heat Into the Frame Beats Retrofitting Later
A heater or radiant panel added after a pavilion is already built usually means surface-mounted conduit, an exposed junction box, or a cord running across a beam. Planning it into the design instead keeps the wiring inside the timber where it belongs, which is one more reason mortise-and-tenon framing rewards a little extra planning at the quote stage. Bracket-built kits from other builders often leave less room to route conduit through the joinery itself, since the brackets sit where a chase would otherwise run.
Most homeowners do not think about heat until after they are using the pavilion through a first chilly evening. We would rather have that conversation before the frame is cut, even if the answer at first is just a stubbed-out circuit for a heater you plan to add later.
Foundation and footing work also happens before the frame goes up, and it is worth coordinating heat, gas, and electrical planning with that stage rather than after the slab or footings are poured. Our pavilion foundation guide covers footing types in more depth.
Cost of Heating a Pavilion
Heating costs for a pavilion range from the price of a single portable propane heater to a full electrical and radiant panel package, and we do not publish a fixed heating add-on price because every pavilion, heat source, and combination is different. A free quote is the fastest way to get an accurate number for your specific structure and location.
| Heat Source | Typical Budget Range | What Drives the Cost |
| Portable propane heater | $150–$800 per unit | Unit size, no install labor |
| Electric infrared heater | $500–$2,500+ installed | Circuit run, number of units |
| Radiant ceiling panel | $1,000–$5,000+ installed | Panel count, electrician labor |
| Wood-burning fireplace / insert | $5,000–$15,000+ installed | Masonry or hearth pad, gas line |
We route every price question, including these, to a free, no-obligation quote rather than an estimate that cannot account for your pavilion’s size, location, and heat source combination. A portable propane heater is generally the least expensive path to warmth, since it needs no electrician or plumber, while a fireplace or a full radiant panel package involves the most labor and the most planning around the frame itself. The clearest way to compare real numbers for your yard is to describe your pavilion size and preferred heat source when you request a quote, so our team can price the electrical, gas, and structural work together instead of separately.
Utah Permits and Safety Considerations
Permit requirements for gas lines, electrical circuits, and sometimes a fixed heater vary by Utah city and county, so we tell every homeowner to confirm with their local building department before work begins. The International Code Council publishes the model codes that most Utah jurisdictions adopt and adapt locally, which is exactly why we do not state a single statewide permit threshold as universal fact. Snow load and wind load also factor into any structure or heat source that is fixed to the frame, and those numbers depend on your site, so our team handles that engineering as part of the design rather than publishing a generic span or load figure here.
A fixed heater, radiant panel, or fireplace can also affect how a pavilion is classified for permitting purposes in some jurisdictions, particularly once a hearth pad or additional enclosure is involved. We flag this early in the design conversation so you know what your local building department will expect before you commit to a layout, rather than finding out partway through the permit process.
What We Recommend for Utah Winters
For most Wasatch Front backyards, we recommend a dedicated electric infrared heater or a radiant ceiling panel as the baseline heat source, paired with a wind wall on the side that takes the worst of the winter wind. That combination covers the shoulder seasons without a gas line, and it leaves room to add a fireplace or a fire pit later if you want a focal point for entertaining. We are a local Utah team with a 4.9 rating on Google, more than 10 years building timber frame structures, and hundreds of completed projects across the state, and the same crew that designs your pavilion also cuts the timber and installs it on site. You can see completed pavilions with different heating and enclosure approaches in our project gallery, including the Barlow Project.
Every recommendation here starts as a conversation, not a template. A pavilion tucked against a house wall handles wind differently than a freestanding pavilion out in the yard, and a family that uses the space daily needs a different heat budget than one that entertains a few times a season. Our custom pavilion guide covers the full design process, including how heating fits into the timeline alongside foundation, framing, and finish decisions.
Frequently Asked Questions About Heating a Pavilion
Can you heat an open pavilion without walls?
Yes. We plan electric infrared heaters or radiant ceiling panels into open pavilions regularly, since both heat people and surfaces directly instead of relying on trapped warm air. Adding a wind wall on the side that takes the worst weather makes either option noticeably more effective without closing in the whole structure.
Do I need a permit to add a heater to my pavilion?
Often, yes, for a permanent electrical circuit or a gas line, but requirements vary by Utah city and county. We tell every homeowner to confirm with their local building department before work begins, since a portable propane heater typically needs no permit while a fixed gas fireplace usually does.
What is the best heat source for a Utah winter?
A dedicated electric infrared heater or radiant ceiling panel covers most Utah winters well, especially paired with a wind wall on the side that faces the prevailing wind. Homeowners who entertain often add a wood-burning fireplace or fire pit as a focal point on top of that baseline heat.
Can I add heating to a pavilion I already own?
Yes, though a retrofit usually means surface-mounted conduit or a portable propane heater instead of a hidden circuit, since the chase for wiring is normally cut into the timber before the frame is assembled. We can walk through the retrofit options during a free quote.
How much does it cost to heat a pavilion?
We do not publish a fixed heating add-on price, since it depends on the heat source, the electrical or gas work involved, and your pavilion’s size. Request a free, no-obligation quote for an accurate number specific to your structure.
Does a fireplace or heater affect the pavilion’s structure?
A fixed fireplace needs clearance to combustible framing and often a masonry or listed hearth pad, which we account for in the layout during design. A radiant panel or infrared heater adds very little load and mounts to the existing rafters, so it rarely changes the structural plan.
Get a Free Quote for a Heated Timber Frame Pavilion
Every pavilion we build starts with a conversation about how you plan to use it, including whether you want it heated for year-round Utah living. Our crew plans the wiring, gas lines, and joinery together so the finished structure never shows an afterthought. Get a Free Quote from us, and we will help you design a pavilion and a heating plan that fits your yard and your budget.

