
What Is a Freestanding Pergola?
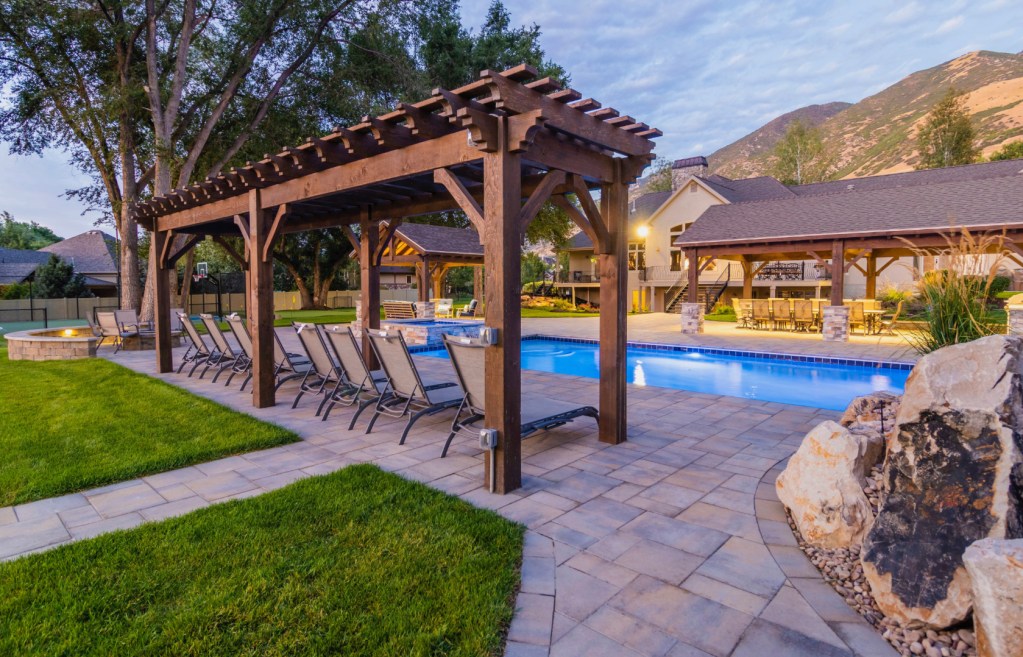
A freestanding pergola is a self-supporting outdoor structure that stands entirely on its own posts, completely independent of your home. It gives you the freedom to place a defined, shaded outdoor room anywhere on your property — poolside, in a garden, or as a backyard destination — without touching a single wall of your house.
Unlike attached pergolas, which are tied to your home, a freestanding model creates a distinct outdoor room wherever you need one. It’s perfect for defining separate zones in your yard, adding architectural interest, or creating a dedicated space for entertaining that feels connected to your landscape but separate from the house.
At Wright Timberframe, we’ve spent years helping homeowners across Utah understand what a freestanding pergola is and how it can transform their outdoor living. With deep experience in traditional timber framing, we’ve seen how a well-crafted pergola can completely change how a family enjoys their outdoor space, creating a cherished gathering spot built to last for generations.
This guide covers everything that goes into planning and building one: how it compares to an attached pergola, the design choices that shape your build, which materials actually last, what the building process looks like, safety factors most people skip, permit requirements, and real cost expectations.
How a Freestanding Pergola Transforms Your Outdoor Space
A freestanding pergola transforms your yard by creating distinct outdoor rooms. It becomes a destination — a shaded retreat for morning coffee, a dining space for summer dinners, or a cozy spot to relax. The dimensions are entirely up to you, not dictated by your home’s footprint.
What is a pergola and trellis is a great starting point.
Freestanding Pergola vs. Attached Pergola: Which Is Right for You?
Choosing between a freestanding and an attached pergola comes down to how you envision using your space. Both are beautiful, but they serve different functions.
Attached pergolas are a natural choice for seamlessly extending your indoor living space outdoors. They use your home for support on one side, creating a perfect transition zone between inside and out.
Freestanding pergolas shine by offering complete creative freedom. You aren’t limited by your home’s architecture or roofline. Their structural independence also simplifies installation — no need to attach to your home’s siding or worry about flashing and seals.
|
Feature |
Freestanding Pergola |
Attached Pergola |
|
Placement Flexibility |
Unlimited, anywhere on your property |
Limited to existing building walls |
|
Structural Independence |
Completely self-supporting with 4+ posts |
Relies on house for one side support |
|
Installation Complexity |
Simpler, no building attachment needed |
Requires careful sealing and flashing |
|
Aesthetic Role |
Creates distinct outdoor destinations |
Extends your home’s living space |
Pergolas, Pavilions, and Trellises: Understanding the Differences
It’s common to confuse these outdoor structures, but each one serves a distinct purpose.
- Pergola: Open-roof design with rafters that create partial, dappled shade. Ideal for climbing plants and defining a space while keeping an airy feel.
- Pavilion: Features a solid roof for complete shelter from sun and rain. Think of it as a true outdoor room, perfect for kitchens or dining areas.
- Trellis: A lighter structure designed primarily to support climbing plants and add vertical interest to a garden.
Pergola vs. Trellis guide explores these combinations in more detail.
Benefits of a Freestanding Pergola
A freestanding pergola delivers advantages that an attached pergola simply cannot match.
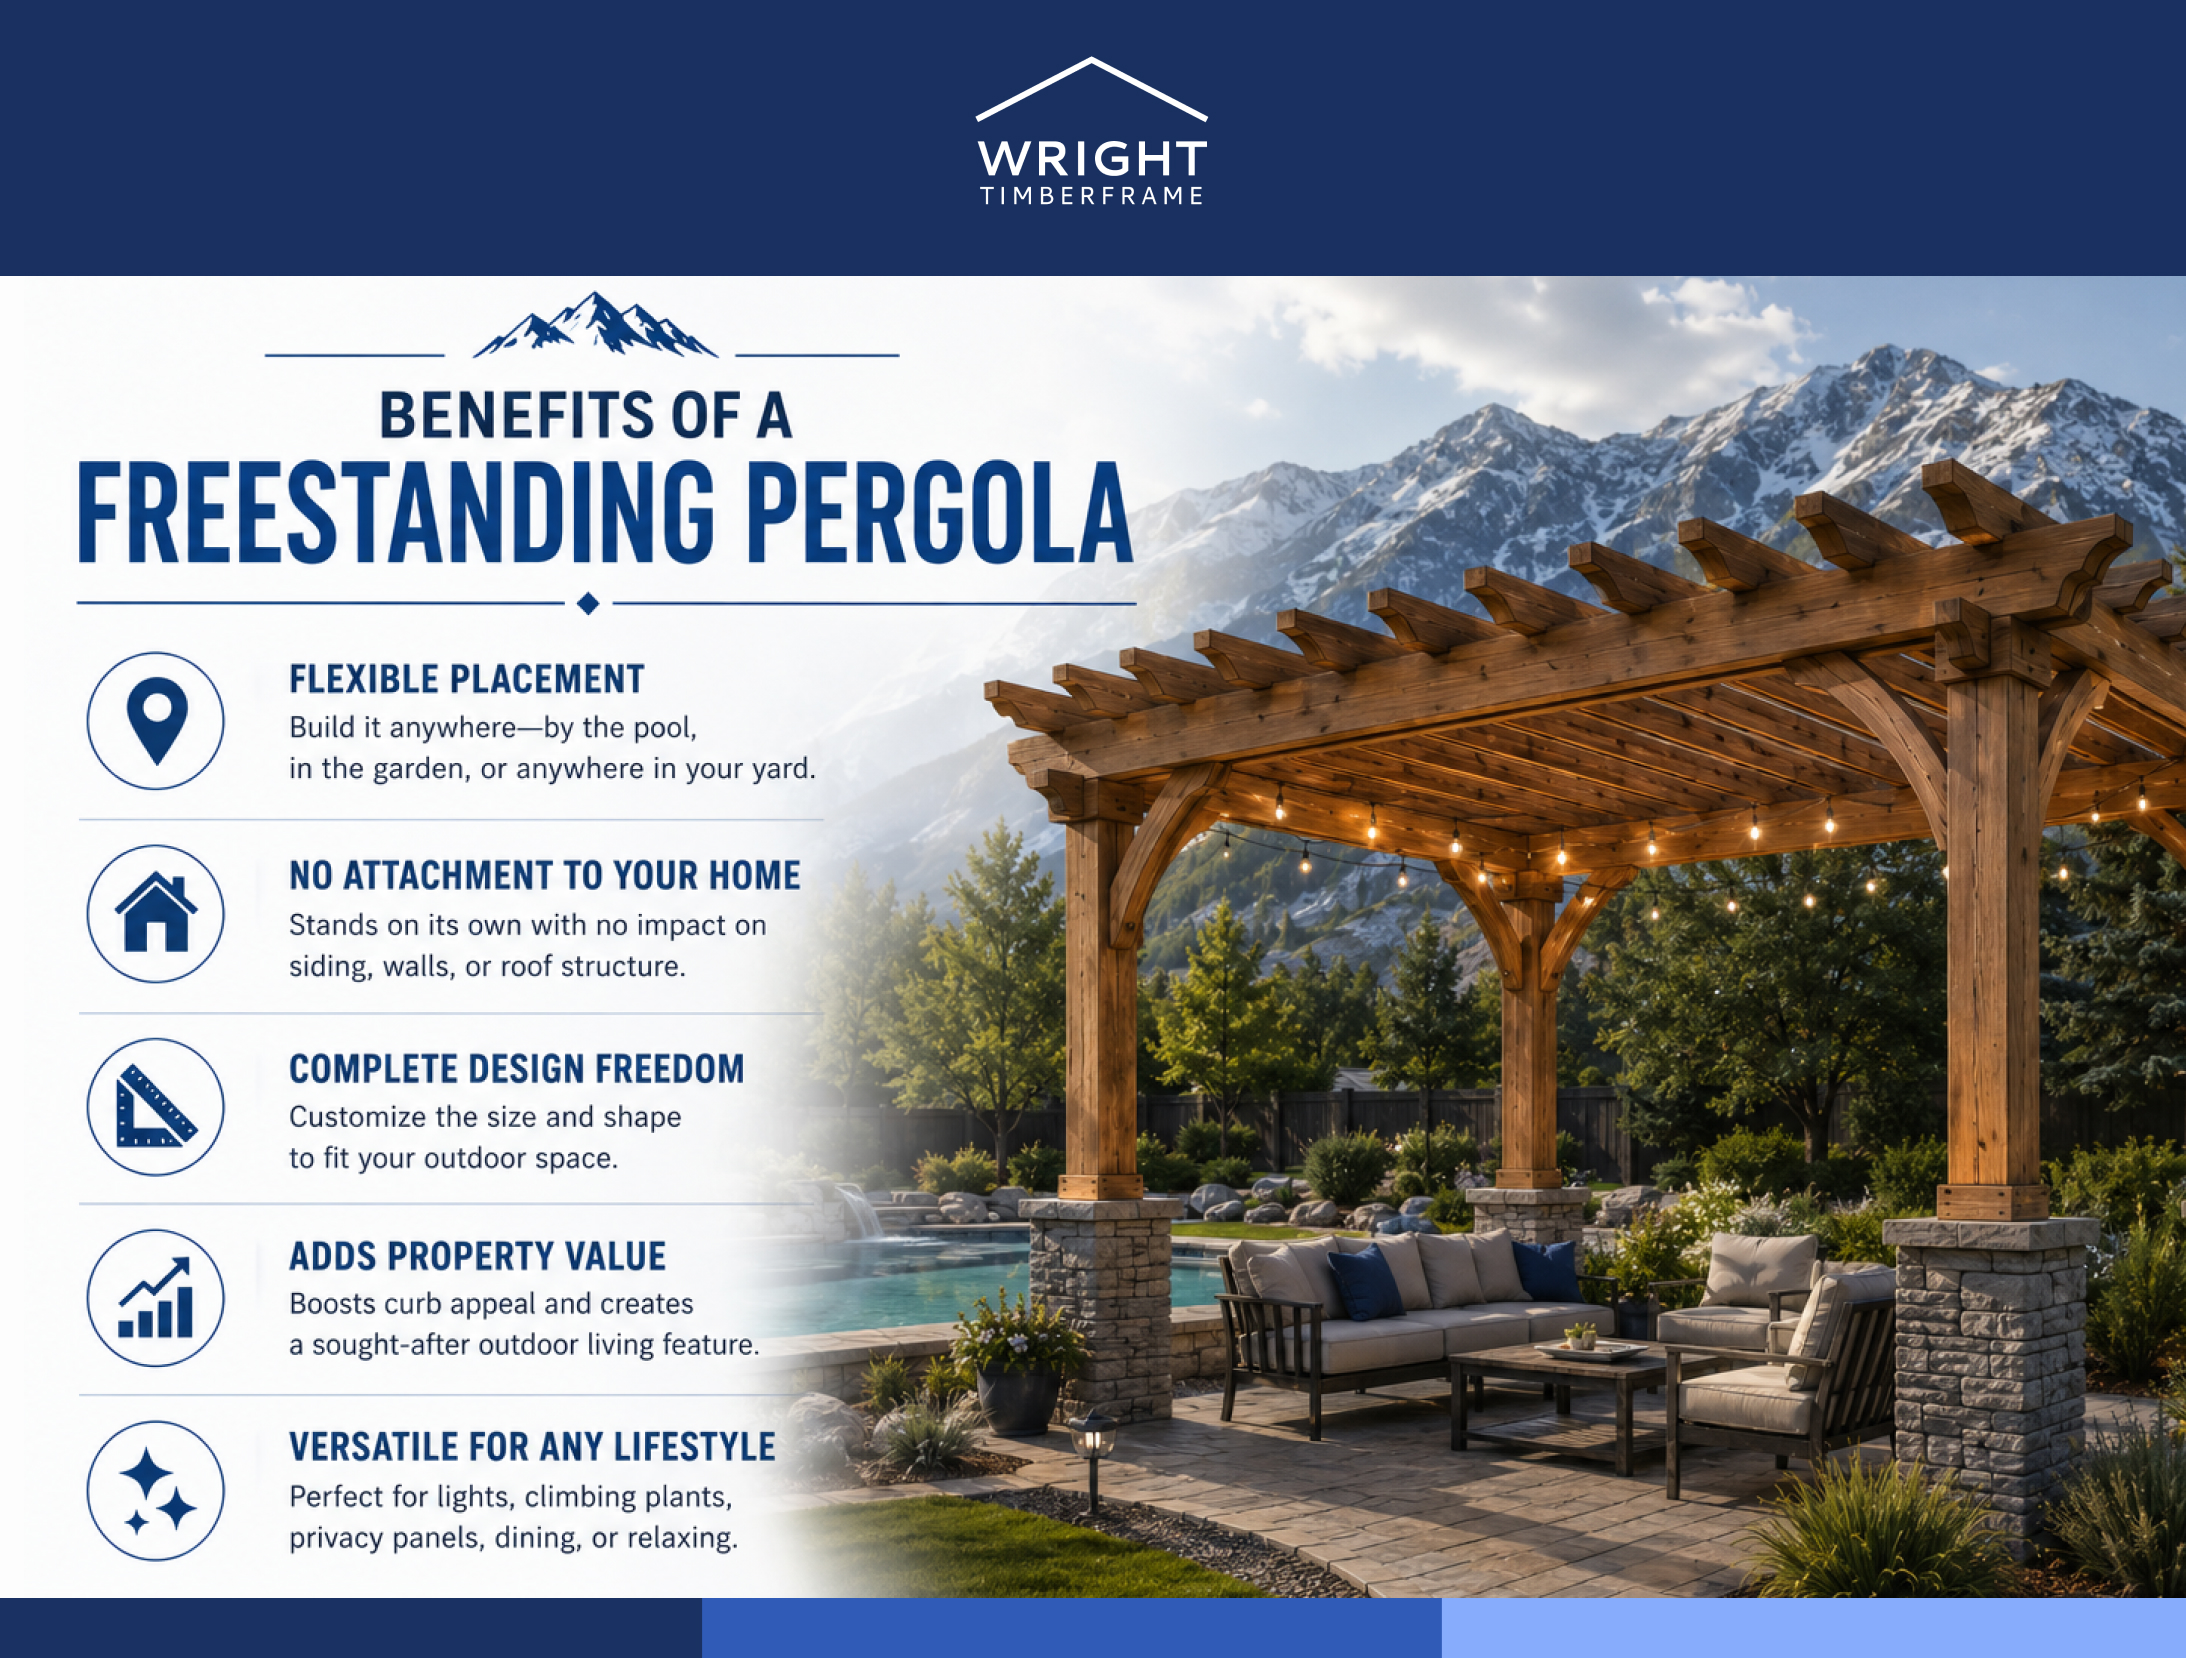
Placement is unlimited. Because the structure relies on nothing but its own posts, you are not bound by the location of a door, the angle of a roofline, or the orientation of your house. Want a shaded retreat beside the pool or a garden nook tucked into the far corner of your yard? A freestanding design makes it possible.
No impact on your home’s structure. Attached pergolas require fastening ledger boards directly to your home’s siding or framing. Done incorrectly, that connection creates moisture entry points and long-term headaches. A freestanding pergola avoids all of that. Your home stays untouched.
Design freedom scales with your vision. Without a wall dictating one dimension, you can build any footprint — a wide rectangular entertainment space, an intimate square retreat, or an L-shaped structure that defines two outdoor zones at once.
Property value lift. A well-built outdoor structure adds measurable appeal at resale. Buyers today treat outdoor living spaces as serious square footage, and a permanent timber pergola signals quality and care in a way that aluminum kits simply do not.
Versatility over time. Move the furniture seasonally, train climbing plants along the rafters, hang string lights or a ceiling fan, or add privacy panels on one side. Because the structure is freestanding, modifications do not affect anything attached to your house.
Key Takeaway: The defining advantage of a freestanding pergola is site independence. You build it where your life actually happens outside, not where your floor plan happens to end.
Freestanding Pergola Design Options
The design of your freestanding pergola shapes how the structure looks, how it feels to sit inside, and how it weathers over the years. Three decisions matter most: size, roofline configuration, and custom features.
Choosing the Right Size
Most residential freestanding pergolas fall somewhere between 10×10 feet and 16×20 feet. Smaller footprints (10×10 or 10×12) work well as intimate seating areas or hot tub covers. Larger footprints (14×16 or 16×20) comfortably handle outdoor dining tables, sectional sofas, and the circulation space around them.
A practical sizing rule: measure the furniture you plan to place underneath, then add at least 2 to 3 feet of clearance on each side. Anything smaller starts to feel cramped the moment guests arrive.
Height matters too. A standard 8-foot post height feels appropriate for intimate spaces. A 10-foot or taller post height opens the structure visually, allows better airflow in summer, and creates a more dramatic architectural presence in the yard.
Pro Tip: Before finalizing dimensions, stake out the footprint on your lawn with spray paint or rope. Live with it for a day. What feels large on paper often feels smaller than expected once you are standing inside the marked-off area.
Style and Roofline Options
The style of a freestanding pergola follows from the architectural character of your home and landscape. Wright Timberframe lets you choose your beam profile and knee-brace style at the kit configuration stage—two decisions that define the structure’s final look.
- Flat-rafter open lattice: The traditional pergola look. Parallel rafters run in one direction, creating repeating lines of filtered shade.
- Crossed-rafter or grid pattern: Rafters run in both directions, creating a more enclosed canopy feel while remaining open to the sky.
- Hip or pyramid roofline: Four sets of rafters rise toward a central peak, giving a more formal, architecturally distinctive presence.
Knee braces, the angled supports running from post to beam, also define the visual character. Wright Timberframe offers multiple knee-brace styles so you can match the structure’s look to your home and landscape.
Custom Features for Function and Style
Once the frame is built, you can transform your freestanding pergola into a fully functional outdoor living space.
- Lighting: Integrated LED strips, recessed lights, or stylish sconces transform your pergola’s personality after sunset, creating a warm, inviting ambiance.
- Climate Control: Ceiling fans provide a comfortable breeze on warm evenings. Built-in heaters can extend your pergola season well into cooler months.
- Privacy: Privacy screens — from fixed timber lattice to retractable fabric panels — give you control over how open or secluded your space feels.
- Shade and Greenery: Design your pergola to support climbing plants. See our guide on combining trellises with pergolas for ideas.
Best Materials for a Freestanding Pergola
Material selection determines how your pergola looks on day one and how it looks fifteen years later. Wright Timberframe builds with two premium choices: Douglas Fir as the standard and Western Red Cedar as an available upgrade. Both are a meaningful step above the pressure-treated pine found in big-box store kits.
Douglas Fir
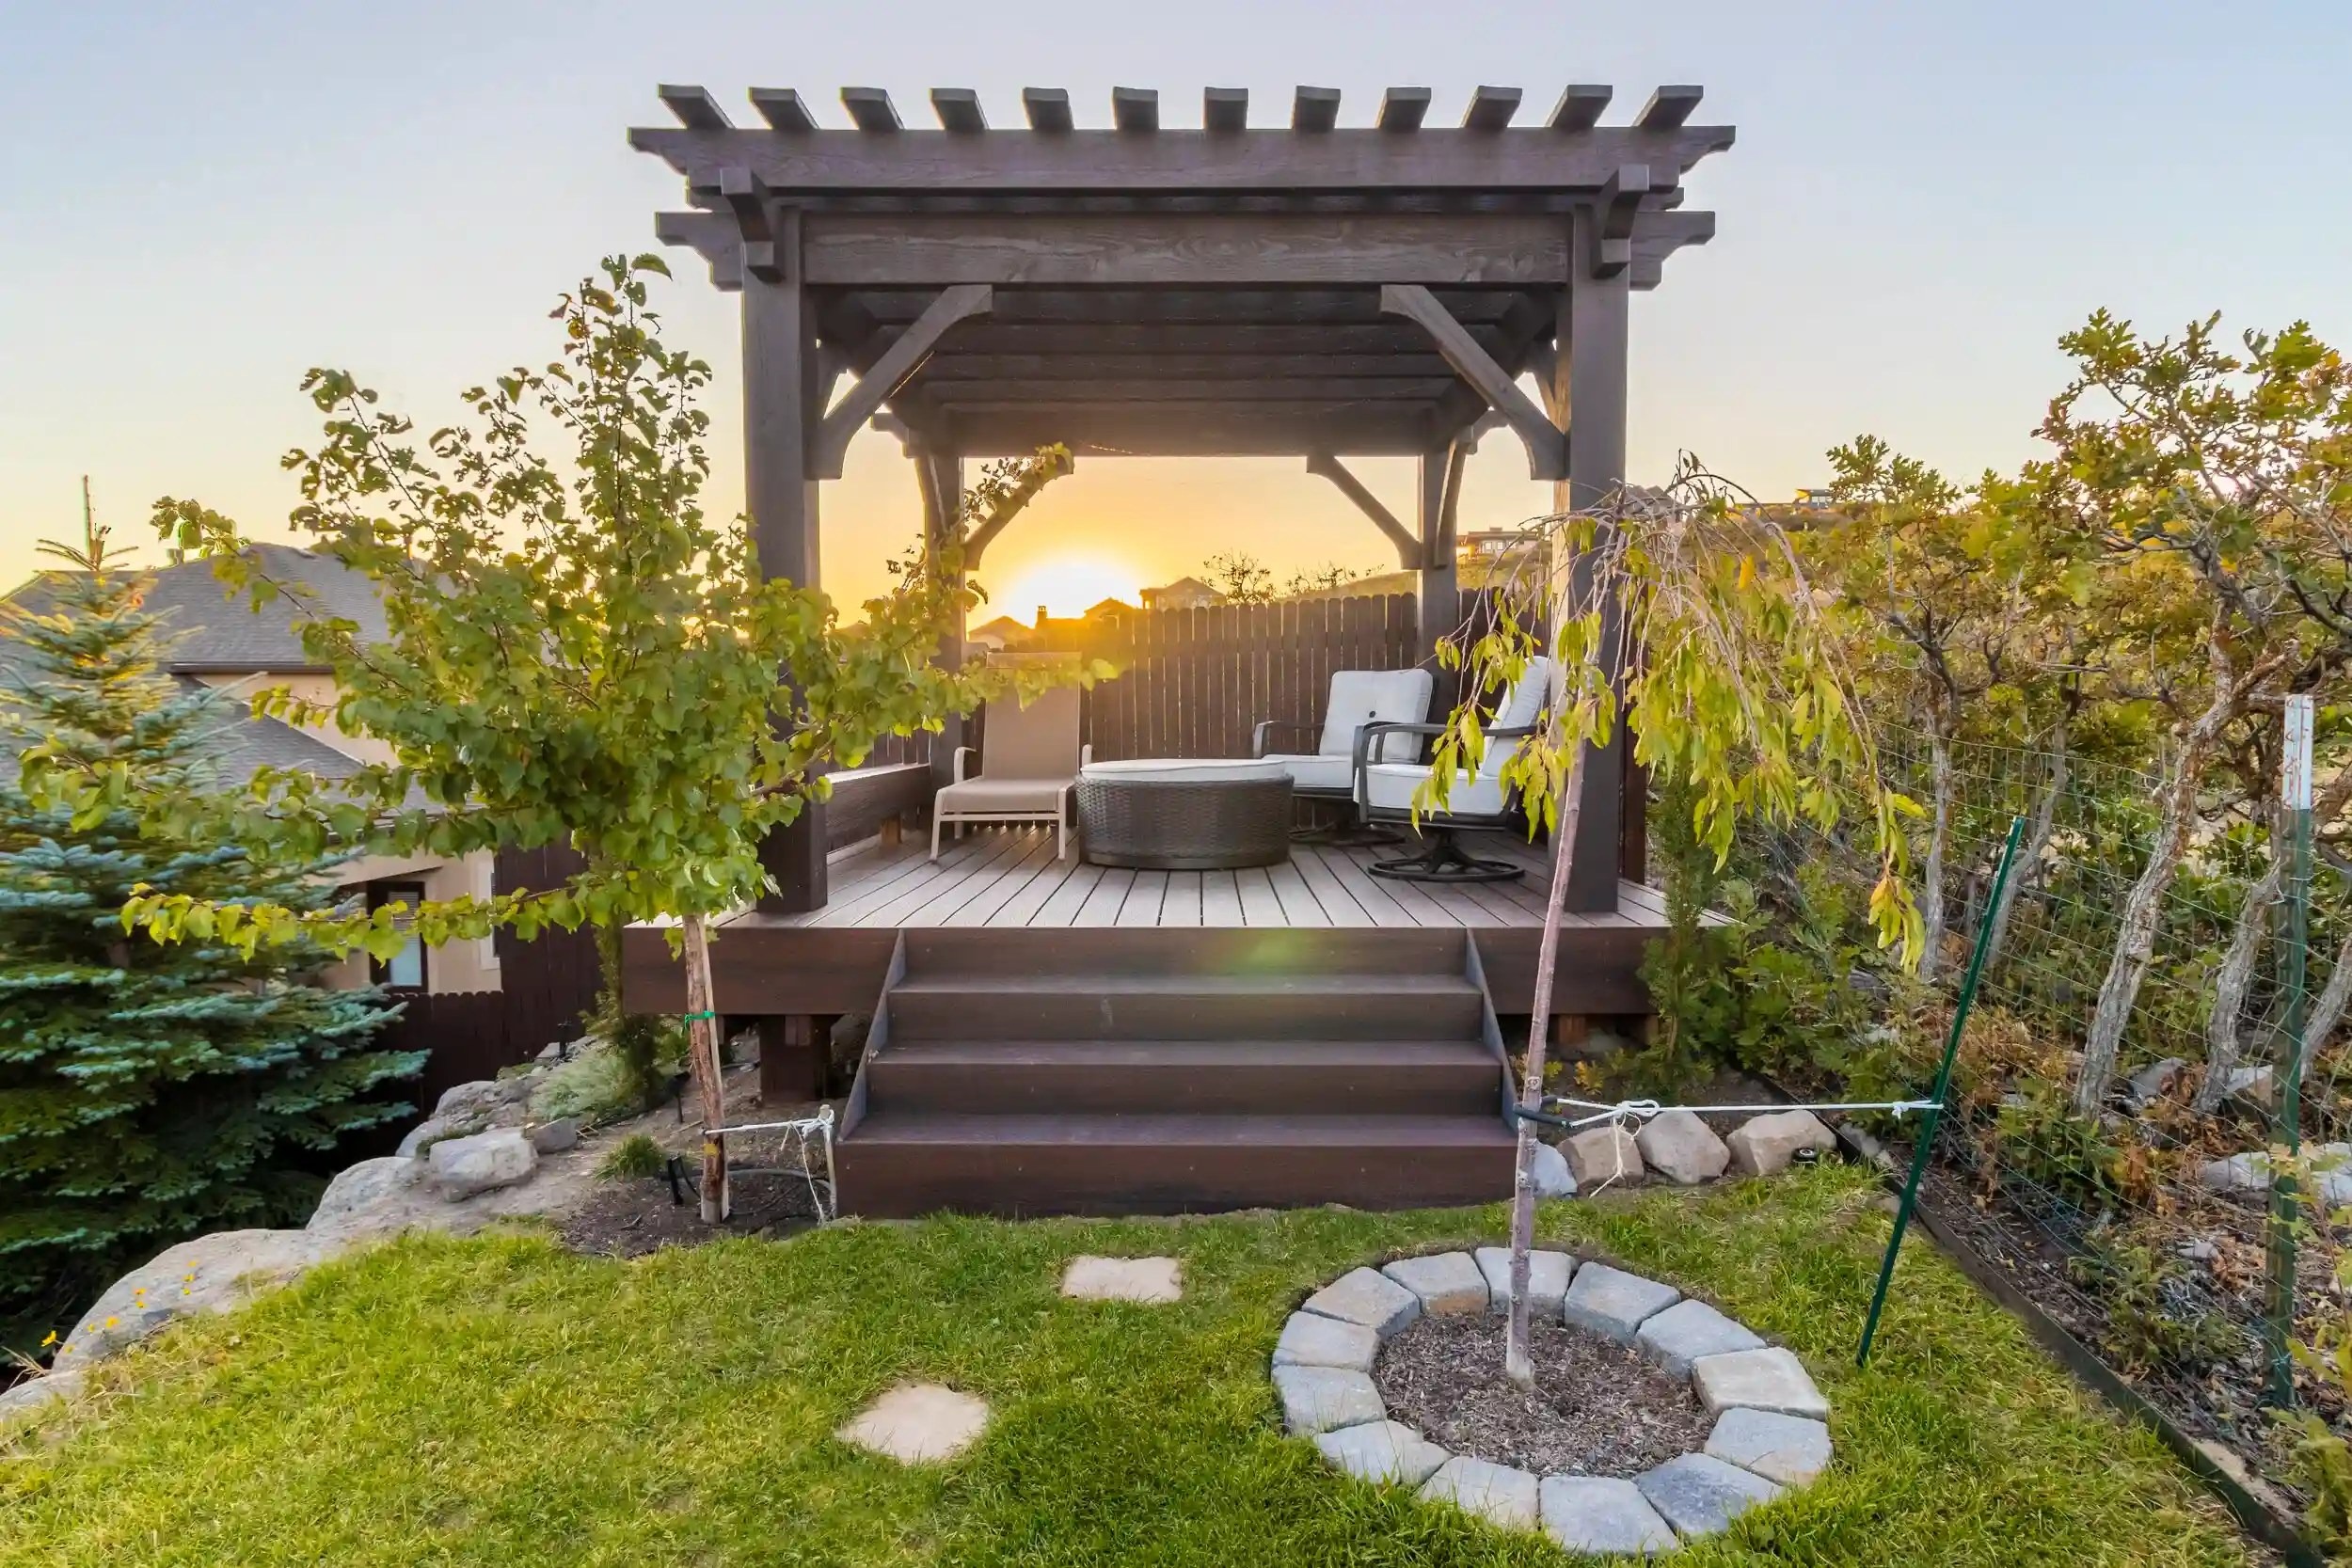
Douglas Fir is the structural workhorse of traditional timber framing. It is one of the strongest softwoods available in North America, with a tight, consistent grain that machines cleanly and holds mortise-and-tenon joinery exceptionally well. For a freestanding pergola, where all lateral load falls on the posts and beams rather than a supporting wall, that structural density matters.
According to the Janka hardness scale, Douglas Fir rates at 660 lbf, well above most softwoods. That hardness translates directly into resistance against denting and surface wear over years of outdoor exposure. With periodic re-staining on a 3-to-5-year cycle, a Douglas Fir pergola maintains its appearance indefinitely.
Western Red Cedar
Cedar brings natural oils that Douglas Fir does not have. Those oils make Cedar inherently resistant to rot, insects, and moisture without chemical treatment — an important factor for homeowners who prefer a lower-maintenance material.
Cedar is lighter than Douglas Fir, and its grain is more visually varied and expressive, often preferred when the natural wood character is meant to be the aesthetic focal point. Cedar also holds dimensional stability well through seasonal humidity swings. Cedar is available as an upgrade from Wright Timberframe.
What to Avoid
Pressure-treated pine is common in big-box store pergola kits. It warps, checks, and splits more aggressively than either Douglas Fir or Cedar as it dries. The preservative chemicals also make it difficult to stain or finish cleanly. Wright Timberframe’s position is direct: no pressure-treated pine—just real, high-grade timber.
|
Feature |
Douglas Fir |
Western Red Cedar |
Pressure-Treated Pine |
|
Structural Strength |
Very high |
Moderate-high |
Moderate |
|
Natural Rot Resistance |
Moderate |
Very high |
High (chemical) |
|
Appearance |
Tight grain, rich tone |
Varied, expressive grain |
Rough, inconsistent |
|
Maintenance |
Re-stain every 3-5 yrs |
Re-stain every 4-6 yrs |
Difficult to finish |
|
Wright Timberframe Use |
Standard |
Upgrade available |
Not used |
Key Takeaway: Douglas Fir is the standard in every Wright Timberframe build. Cedar is available as an upgrade for those who prioritize natural rot resistance or lighter weight. Either is a significant step up from pressure-treated pine.
How to Build or Install a Freestanding Pergola
Building or installing a freestanding pergola starts with proper site preparation, post placement, and structural assembly to ensure the structure stays stable for decades. A freestanding pergola build follows a predictable sequence, whether you are working with a professional crew in Utah or assembling a pre-cut kit yourself anywhere in the country.
The Core Build Sequence
- Site preparation and layout. Mark the post locations precisely. For a rectangular pergola, use the 3-4-5 triangle method to confirm all four corners are square before digging.
- Post footings. This is the most critical step. Because a freestanding structure has no wall for lateral support, the footings carry all structural load. Concrete tube forms set below the local frost line are standard. In Utah, frost depth typically runs 24 to 36 inches depending on elevation; always confirm with your local building department.
- Post setting. Timber posts are plumb-set into post bases anchored in cured concrete. All posts must be level with each other and absolutely plumb. Misalignment at this stage compounds through every step above.
- Beam installation. The main beams span between posts using mortise-and-tenon joinery; no metal brackets required. The tenon fits snugly into the mortise, creating a wood-to-wood connection that is both structurally strong and visually clean.
- Rafter installation. Rafters span across the beams at regular spacing, typically 16 to 24 inches on center. Rafter tails are often cut with decorative profiles that add visual detail.
- Finishing and staining. Wright Timberframe kits arrive pre-stained using Behr stain. A wide color palette is available to match your home and landscape.
Kit vs. Professional Installation
DIY kit route works well for the capable homeowner. Components arrive pre-cut, pre-stained, and ready to assemble using the mortise-and-tenon system. Corners interlock and support beams slide into place. Many customers find it a memorable family project.
For homeowners in Utah who prefer a hands-off approach, Wright Timberframe offers professional installation. The crew handles everything from site prep to final assembly. Anchoring is non-negotiable; concrete footings or specialized brackets for existing patios are used to create a rock-solid foundation.
Long-term care is straightforward. Weatherproofing your timber frame pergola involves regular staining and sealing every few years to protect the wood from UV damage and moisture. An annual inspection and cleaning will keep your timber frame pergola beautiful for generations.
Safety Considerations for a Freestanding Pergola
A freestanding pergola that looks right but is built wrong is a liability, not an asset. These are the safety factors that matter most.
Footing depth is non-negotiable. Footings set above the frost line will heave during freeze-thaw cycles, gradually racking the structure out of plumb. In regions with significant snowfall or high winds — common throughout Utah- inadequate footings are the primary cause of pergola failure.
Lateral bracing matters. An open rectangular frame without diagonal or cross-bracing can rack under wind load. Knee braces at the post-to-beam connection provide this lateral resistance. This is one reason Wright Timberframe builds knee braces into every structure rather than treating them as optional decoration.
Electrical and lighting. String lights draped over rafters are low-risk. Hardwired electrical — ceiling fans, recessed lighting, outlets- requires a permitted electrical installation with weatherproof fixtures and GFCI protection.
Post bases and moisture. Post bases that hold the post slightly above the concrete surface prevent moisture from wicking into the end grain at grade level. That single detail makes a measurable difference in long-term post life.
Annual inspection. Walk the structure once a year. Check for post base rust, beam checking (natural surface cracking in timber), loose hardware, and any signs of wood decay at grade level. Catching small issues early keeps them from becoming structural ones.
For more on this, see our pergola safety tips for ensuring a secure structure.
Do You Need a Permit for a Freestanding Pergola?
Most freestanding pergolas require a building permit, but the specific threshold varies by jurisdiction. The factors below typically trigger a permit requirement. For a full walkthrough, see Wright Timberframe’s dedicated guide on freestanding pergola permit requirements.
- Square footage over 120 sq ft. Most jurisdictions exempt very small accessory structures, but anything approaching a 10×12 footprint or larger will likely need a permit.
- Height over 8 to 10 feet. Taller structures are more visible from neighboring properties and more exposed to wind loads.
- Electrical or plumbing additions. Any utility work requires a separate trade permit in addition to the structural permit.
- Location relative to property lines. Most municipalities require accessory structures to sit at least 5 to 10 feet from side and rear property lines.
- HOA rules. The HOA approval process is separate from the municipal permit process. Both are typically required.
The consequences of skipping a required permit are real: fines, stop-work orders, forced removal, and disclosure obligations when selling your home. Permit fees typically run between $50 and $300 depending on the jurisdiction and project value.
Pro Tip: Call your local planning or building department before you finalize your design. A five-minute conversation can tell you exactly what is required in your specific municipality and save weeks of back-and-forth later.
Cost and Lifespan of a Freestanding Pergola
The cost of a freestanding pergola depends on four primary variables: size, material choice, joinery system, and whether you install it yourself or hire a crew.
The price can range from a few thousand dollars for a basic kit to $10,000 or more for a large custom structure. Key factors that influence the total include:
- Materials: Premium timbers like Douglas Fir and Western Red Cedar have a higher upfront cost but offer superior durability and beauty compared to vinyl or aluminum.
- Size and Complexity: A larger or more intricate design requires more material and more labor.
- Custom Features: Integrated lighting, fans, heaters, and retractable canopies add to the investment.
- Installation: DIY kits offer great value, while professional installation guarantees expert execution.
Whatever your base kit or installation price, also budget for:
- Permit fees, typically $100 to $300
- Electrical, if you plan hardwired lighting or a ceiling fan
- Optional additions such as privacy panels, shade fabric, or climbing plant supports
Lifespan Expectations
A timber freestanding pergola built with Douglas Fir or Cedar, properly finished, and maintained with periodic re-staining should last 20 to 30 years or more. The joinery system matters significantly here. Mortise-and-tenon connections outperform bolt-and-bracket assemblies over time because they do not rely on metal hardware that can corrode and loosen.
The posts are the most vulnerable component. Post bases that hold the post slightly above the concrete surface prevent moisture from wicking into the end grain at grade level. With quality materials, sound joinery, and minimal annual maintenance, a well-built freestanding pergola is a decades-long asset.
Why Wright Timberframe for Your Freestanding Pergola
Wright Timberframe has over a decade of timber frame experience in Utah and has completed hundreds of projects, from backyard pergolas to large-scale builds. The team rates 4.9 stars on Google and is known for precision, clean job sites, and honest service.
Kits arrive pre-cut and pre-stained with Behr stain, with corners that interlock and support beams that slide into place. The structure looks finished the day it goes up. Configuration is simple: choose a beam profile, choose a knee-brace style, and choose your stain color. The team then guides you through a custom quote based on your exact dimensions.
For Utah homeowners who want professional installation, Wright Timberframe handles everything from site assessment to final finish. For everyone else, the nationwide kit program delivers a premium timber structure to your door, ready to build.
Check the Wright Timberframe gallery to see the full range of styles and sizes in real installations.

Frequently Asked Questions About Freestanding Pergolas
How do you anchor a freestanding pergola?
Proper anchoring is critical for the safety and longevity of a freestanding pergola. The standard is setting posts in concrete footings, typically 2 to 3 feet deep depending on your local frost line. If you’re installing on an existing concrete patio, heavy-duty post brackets that bolt directly to the surface are the alternative. Cutting corners on anchoring is a safety hazard.
Do you need a permit for a freestanding pergola?
Permit requirements vary dramatically by city and state. While smaller pergolas might not require a permit, larger structures, especially those over a certain height or with permanent footings like the ones we build, often do. There may also be rules about how close you can build to property lines. The best advice is to call your local building department. A quick phone call upfront can save you from major headaches and ensure your project proceeds smoothly.
How much does a freestanding pergola cost?
Cost varies based on size, materials, custom features, and installation method. A basic kit can start at a few thousand dollars, while a large custom structure can exceed $10,000. Contact Wright Timberframe directly for a quote based on your specific configuration and dimensions.
What is the best size for a freestanding pergola over a dining table?
A 10×12 or 12×14 footprint suits most standard outdoor dining tables with six to eight chairs. Measure your table, add 3 feet on each side for chair pullout and circulation, and use that total as your minimum interior pergola dimension.
How long does it take to build a freestanding pergola?
A pre-cut kit can be assembled by two capable adults in one to two weekends once footings are cured. Professional installation typically runs one to two days for a standard residential pergola. Permit approval timelines can add one to four weeks to the overall project schedule.
Your Freestanding Pergola, Built Right from the Start
A freestanding pergola transforms underused yard space into a destination you actually want to spend time in. Every decision covered in this guide — size, material, permit, build method — adds up to a structure that either works for decades or costs you more than expected to fix or remove. Choose real timber. Pull the permit before you pour the concrete. And work with builders who put their name on what they build.
Ready to see what’s possible? Explore Wright Timberframe’s custom pergola options or browse the completed project gallery to see the full range of styles and sizes available.

